 Rated Excellent
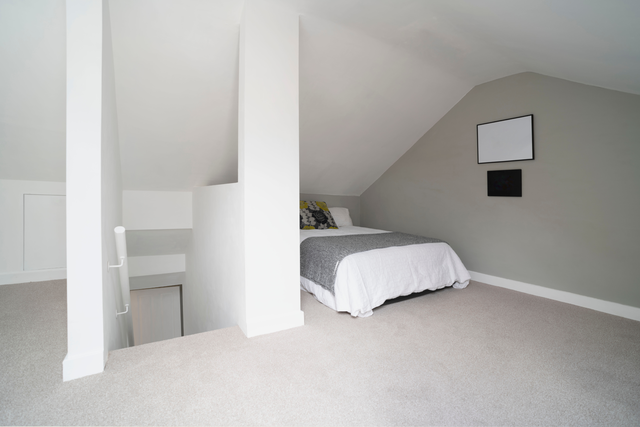
Turn Your Loft into A Dream Space For Winter
Space is a premium in any home, and there are two main ways of finding more; an extension that eats into your garden or a loft conversion. The latter is a great way to keep your outdoor space and turn what is commonly used just for storage into something else - anything else!
Whether it’s an office, a guest room or just a place you can cosy up in during the winter months - it is possible.
This is a big project, but some loft conversions can be done yourself with careful planning. Done right, you’ll see the value of your home increase drastically, if the time ever comes you’d like to sell and move on.
Before any loft conversion
There are some things to think about before getting started. It might be tempting to jump in and start converting your loft - especially if you have an idea for how you want to use it - but this could lead to problems later.
One of these factors is headroom, for example. There is a minimum amount of space needed to use your loft as an actual room rather than storage space. For traditional cut rafter and purlin roofs, you need 2.2 - 2.4m, while for more modern trussed roofs, this changes to 2.4 - 2.6m.
Plan first and save yourself a lot of trouble.
Deciding what to use the space for
Loft conversions open up so many possibilities. Perhaps you’d like to add another bedroom - even one with an ensuite - or maybe you’d like a home office space where you can work without distraction?
Hobby rooms are popular choices, as well as being great places to store everything you need for them without cluttering the rest of your home. What about a warm, cosy room perfect for you to spend those cold, winter months? This can be a multi-purpose room, giving you the most use out of your new space.
Whatever you choose, decide in advance to make sure the conversion is the right one.
The loft conversions you can choose
There are different loft conversions, and each involves different amounts of work.
Internal loft conversions are one of the most common and easily done choices. They don’t change much to the external structure of your home and most steps can be done over time without massive disruptions. There will be some alterations to the roof with windows being installed, but more work around the floor and insulation.
Dormer loft conversions are seen on lots of properties. They have the benefit of adding windows and height to more of your loft space, providing more room for adults to walk around freely. There are plenty of dormer conversions to choose from, with single, full width, side, L-shape and hip-to-gable all options - depending on your property.
Roof off conversions are the most complicated and disruptive of all conversion options, but generally off the most space that’s catered specifically for your home and needs. Whole sections of the roof must be removed and replaced - if not the entire thing. Mansard conversions and prefabricated lofts are the main choices here.
For this guide, we’ll look at internal loft conversions. These are, realistically, the most common ones for DIY projects unless you have a lot of experience in building work.
For the others, if they are a better fit with your needs, you might be better seeking the help of an expert.
Do you need planning permission?
For internal loft conversions, you most likely will not need planning permission, as you have an amount of space you can utilise on your property under Permitted Development Rights and won’t be altering the roof or structure of your home. Other loft conversions will require planning permission, however.
That said, your conversion plans need approval under Build Regulations and Party Wall rules require you to inform your neighbours of the work you’re carrying out.
Adopt a full plans approach so you have everything covered, can answer any questions that come your way and so you know for yourself what you need to do at all times.
Finally, if you do want to list this as a room in your home that can be used, especially if you move on, it needs to be checked by your local authority and issued with a certificate to prove it is safe and of the right quality.
How long it will take to transform your loft
Converting a loft, even a small one undergoing an internal conversion, involves a lot of steps and this takes quite a bit of time. This is not the easiest DIY project, sitting at the top end of intermediate to advanced levels of difficulty. This is down to the number of steps involved and the checks you’ve got to make at each stage as you go along.
As a result, this kind of project can take anywhere from 120 hours or more to complete, depending on the size of the loft and what you plan to do with it. Some steps might not take long, but finishing the conversion with the look and feel you want will add on a lot more time.
The tools you will need
To complete a loft conversion, there are a lot of steps involved. They each require different tools, such as:
- Work gloves
- Safety glasses/goggles
- Spirit level
- Screwdriver (manual or powered)
- Nail gun (and compressor)
- Measure tape
- Cutting Tools
- Workstation
- Hammer
- Spanner
- Paintbrush
- Plastering tools
Converting your loft into a winter haven
Before thinking about how to decorate and fit out your loft into that warm, cosy den you’re after, you need to make sure it’s fit to be used as a room.
The following steps will lead you through the conversion process, followed up with ways to make that haven you’ve been longing for.
Step 1: Assess and measure the loft
You’ll need:

The first thing to do is see what space you have to work with. As mentioned earlier, traditional cut rafter and purlin roofs need 2.2 - 2.4m of room, while modern trussed roofs require 2.4 - 2.6m.
Measure the gaps so you know the space you’re working with. You’ll need to take into account gaps between joists, length of joists and more.
This is for new support beams for the flooring, windows and even what space in the eaves you can use for storage.
Measure everything you can.
Step 2: Strip the space down
You’ll need:

Everything you have currently in the loft needs to be removed and stored elsewhere for the duration of the conversion.
Once done, you can remove any floorboards currently in place, leaving enough for you to move around the loft with.
Step 3: Add new roof and floor supports
You’ll need:
- Work gloves
- Safety glasses/goggles
- Spirit level
- Screwdriver (manual or powered)
- Nail gun (and compressor)
- Measure tape
- Cutting Tools
- Workstation
Optional:

The current roof supports will most likely not be strong enough to handle the weight of furniture and people in the loft.
You can add new supports on top of the existing joists, if that leaves you enough space, but in some cases, they’ll need to be replaced entirely.
You need thicker beams for the flooring to make sure you avoid putting pressure on the plaster beneath. These beams will connect to existing roof supports while offering more opportunities for other joists.
This can give you flexibility in using and decorating the loft to suit your needs.
Step 4: Adding the windows
You’ll need:
- Work gloves
- Safety glasses/goggles
- Spirit level
- Screwdriver (manual or powered)
- Measure tape
- Cutting Tools
- Workstation

Once the right supports are in place for the new floor and roof, you can see where best to put the windows.
These are necessary, as they also act as a fire escape (should it be necessary).
In many cases, this will be in between support beams for easy access and installation. You can mark out where they should go and cut through the tiles and roof.
Depending on the exact windows, a frame can be made and fit into the gap to better accommodate the windows, or some may have frames ready to install in the gap.
Step 5: Insulating the roof
You’ll need:

Chances are that the floor of your loft has already been insulated, as this is common in many properties. This is fine for rooms underneath but to make the loft into a room, the entire loft will need insulation.
Insulating every wall and part of the roof in your loft can be done in much the same way as the floor. Batts insulation makes it easier to secure, and comes with the vapour barrier already attached in most cases.
Step 6: Stairs and access
You’ll need:
- Work gloves
- Safety glasses/goggles
- Spirit level
- Screwdriver (manual or powered)
- Nail gun (and compressor)
- Measure tape
- Cutting Tools
- Workstation

To work as a functioning room, your loft needs better access than a hatch and ladder. This might work fine in the interim, but it’s not suitable as a fire escape or to move furniture up and down.
There are pre-built stairs you can buy, or have some custom made. Ideally, these should sit over an existing staircase, but depending on the layout of your home, you may need to look at other options.
This will change the flooring and entrance to the loft, so having it planned out early in the project will help.
Step 7: Creating the room
You’ll need:
- Work gloves
- Safety glasses/goggles
- Spirit level
- Screwdriver (manual or powered)
- Nail gun (and compressor)
- Measure tape
- Cutting Tools
- Workstation
- Hammer
- Spanner
- Plastering tools

Once it’s insulated, you can begin to create the actual room you want.
It starts with the flooring. Floorboards need to cover the entire loft, and you’ll use either panels for the walls and roof or plasterboard.
Depending on the roof supports and the layout, you can integrate those into the room’s design or hide them away as you create the walls and ceiling. This is partly a personal choice.
Remember to make use of the eaves for storage and leave space for access or create doors for a seamless look.
Step 8: Electrics and plumbing
You’ll need:
- Work gloves
- Safety glasses/goggles
- Screwdriver (manual or powered)
- Measure tape
- Workstation

While you probably have a pre-existing light fixture in the loft, you might not have power outlets - and if you do, not where you need them. In the short term, you might be able to make do, but have a plan for the long term.
The same applies to plumbing if you plan to have an ensuite. This might be an addition to your existing water system, but hiring an expert can make this easier to sort.
Both can be done alone, but you’ll need more in depth knowledge on these areas.
Step 9: Creating your dream winter loft

Now that you have your loft converted, it’s time to start decorating. A lot of this comes down to personal choice and what you plan to use the loft for, as mentioned earlier.
Start with the colour. We’d recommend a light colour, from white to cream to pale pastels if you want a theme. This is to make the room feel bigger and capture as much natural light during the short, winter days that you can.
White is a great colour to capture the essence of snow, and can be livened up with colours from furniture and other decor that allows you to be flexible with themes in the future.
Match your flooring to the colour scheme. A carpet will be warmer and more comfortable for you, while hiding the floorboards installed. A rug can help in the short term, though.
A cosy corner is also a fantastic idea, a warm spot just for you. A soft chair close to a window to make use of the light but in good reach of a lamp or the ceiling lights for when the evening rolls in.
A bed allows this room to double up as a guest room when needed, while a desk lets you make this a home office or hobby room at the same time.
Position these where there’s a good amount of headroom to stand and move around.
Step 10: The final touches

With the core of your loft in place, you can add the finishing touches to your loft winter haven.
You have plenty of storage in the eaves, but don’t forget the value of a small wardrobe or chest of drawers. This helps guests staying with you but also offers easy access to anything you want to have to hand.
Curtains should be light in colour to help with the atmosphere, but the material matters. Look for heavier fabrics that can trap some of the heat inside. However, the nature of the sloping windows may make them impractical, and blinds may be a better option.
Rugs and throws are perfect for adding splashes of colour to your loft. They serve as a way to keep you warm while being easy enough to change with each season - or store for warmer months.
With all this in place, you have a perfect dream loft for the winter that you can enjoy in the warmer months, too!